In this post, I will show how you can easily create professional looking promotional images for your Windows Phone app. You can use these promotional images on your websites, or while submitting your apps to review sites or for creating ads for your apps.
In this tutorial, I will create a promotional image for one of my apps, MyTileMaker to show you the required tools and steps.
Required Tools
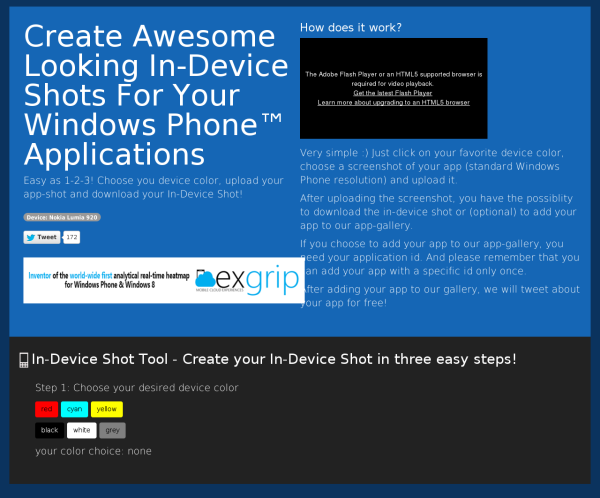
1. ExGrip WP Additives Device Mockups – It is a good place to easily create awesome in-device shots for your Windows Phone apps for free.
2. Paint.NET – It is a free image editing tool with simple interface.
Steps
1. Choose your device color on ExGrip WP Additives. I have chosen black color for Nokia Lumia device.
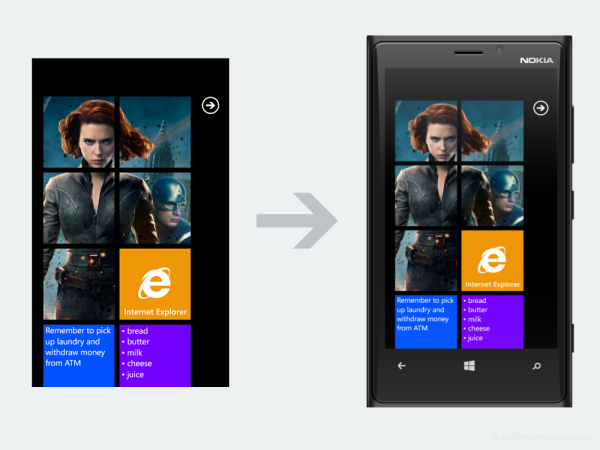
2. Upload a screenshot of your app in PNG format. You can select from the screenshots of your app that you have submitted in Dev Center. For example, I have chosen the first screenshot of MyTileMaker.

3. Download the in-device shot. You can also add your app to the app gallery of ExGrip. In that case, they will tweet about your app for free!
Below you can see the app mockup that got created from MyTileMaker screenshot inside black Nokia Lumia 920.
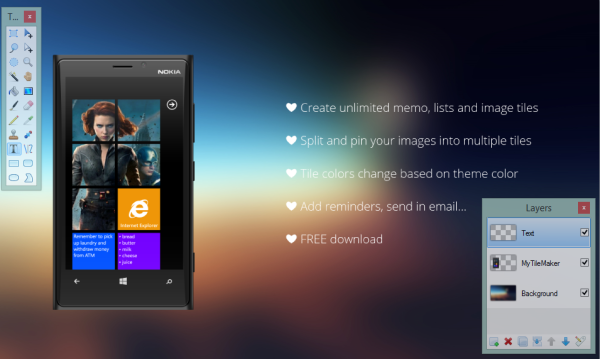
4. Choose a background image. To add some depth to the in-device shot, I will now add a blurred background to it using Paint.NET.
You can refer to my earlier post for free sets of blurred backgrounds that you can use for this purpose. Alternatively, you can also create a blurred background on your own.
5. Open your blurred background in Paint.NET.
6. Import the in-device shot.
Go to Layers -> Import From File and select the in-device shot. This will add a new layer to your Paint.NET project.
7. Add your app features.
Go to Layers -> New Layer or add a new layer from Layers window. Double click on this layer and rename it to Text.
Using Text tool, write down the features of your app that you want to highlight on this layer. As you can see, I have used heart symbol ‘❤’ instead of normal bullets for highlighting.
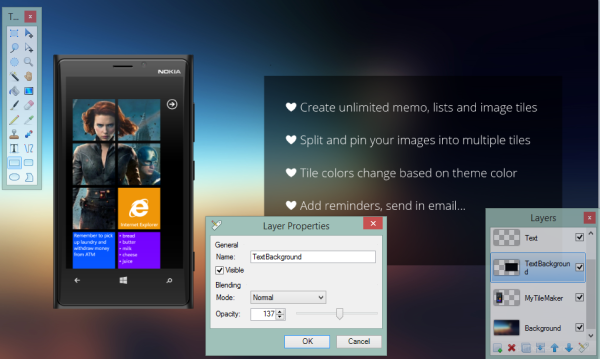
8. Add Text Background.
To make the app features stand out, let us add a translucent background to the text.
For this, add a new layer from menu or Layers window. Rename it to TextBackground. Move this layer below the Text layer in Layers window.
Select Rectangle tool. Make sure that you have selected Draw Filled Shape from menu. Keep black as the Primary color. Now draw a rectangle around the text that you have written.
Now, double click on this layer, it will display the layer properties.
Adjust the opacity of this layer. I have set it to 137. You should play around with this value to see what works best for you.
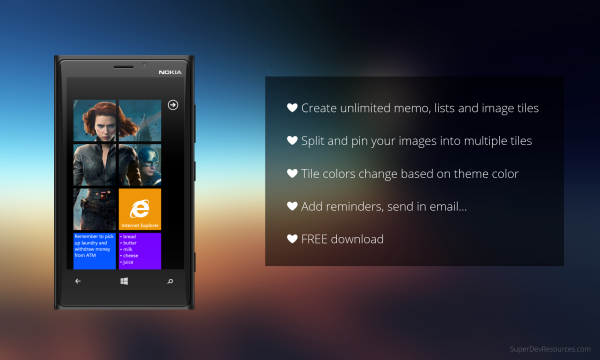
Final Image
Below is the final promotional image for MyTileMaker.

Hope you found this tutorial helpful. Please don’t forget to share it with others.
Thank you for that awesome blog-post! We created this service and run it a little bit for over a year now. Through many conversations with Windows Phone developers, we collected enough data now to extend the service and make it much better. This service will stay free. Cheers, Ilija.
Thank you for creating this free service. Looking forward to the extension of the service that you mentioned. Do keep us updated about it.
Useless article
I would love to know why you found this article useless.
Came across this article yesterday as I prepare to promote my latest app (http://bit.ly/GoodNewsApp) and found it extremely helpful. Do you plan to offer other device types/models for the screenshot service? It just so happens I’m using a L920 so I like what’s there but I’m curious if other device screenshots will be made available in the future.
Thanks Jeff. I am glad that you liked it. The in-device shot service is provided by ExGrip LLC (http://www.exgrip.com/). Kindly contact them through their website for your query.
Site is NOT working now.
Are you aware did it changed?
As far as we know, the website is no longer available. However you can find a lot of other mockup generators in our directory: https://superdevresources.com/directory/marketing-resources/app-screen-mockups/