In this tutorial, I will show how you can easily create snowflakes in Inkscape. Winter landscapes cannot be complete without beautiful snowflakes. While creating the freebie winter inspired Christmas card, I used snowflakes to complement the snowy landscape that I wanted to portray. And in this tutorial, you will learn how you can also create snowflakes using rectangle tool and simple transformations like scaling and rotation in Inkscape.
I have also included a video tutorial in the end for you to see all these steps in action. Let’s begin!
1. Create Base Branch for your Snowflake
Step 1
Create a new document in Inkscape.
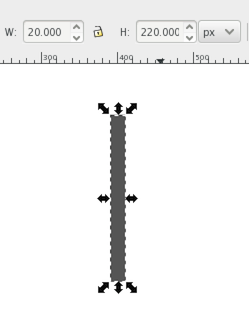
Grab the Rectangle tool (F4) and draw a 20px x 220px rectangle as shown below.
You can select your rectangle (F1) and adjust its dimensions from the tool control bar. Do not worry about the fill color, we will change it later.
Step 2
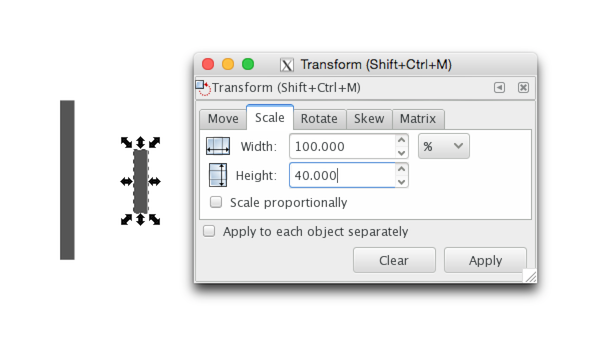
Duplicate this base rectangle using Ctrl+D or from menu option
Next go to Object->Transform (Shift+Ctrl+M) to open the Transform window in Inkscape.
Go to Scale option and input following parameters to only change the height keeping the width unaffected.
Step 3
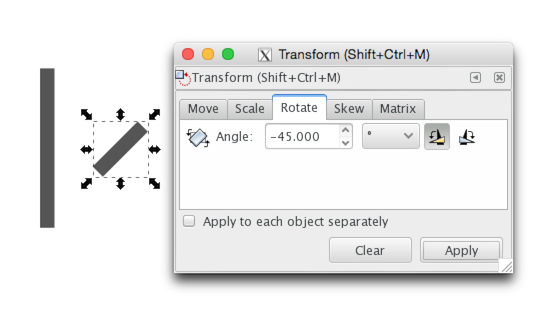
Again select the smaller rectangle and go to Rotate option in Transform panel. Enter -45 degrees as shown below.
Step 4
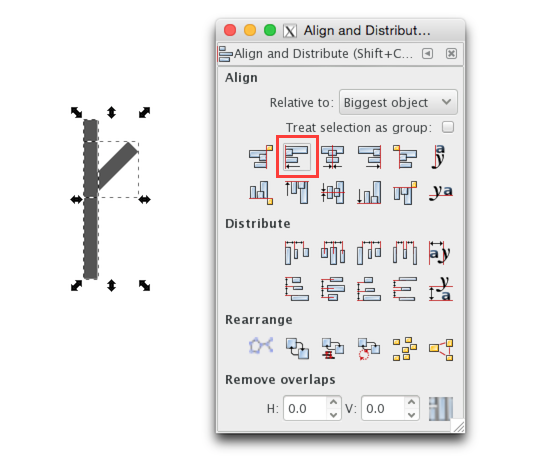
Drag the transformed rectangle and align it to the left edge of the bigger rectangle.
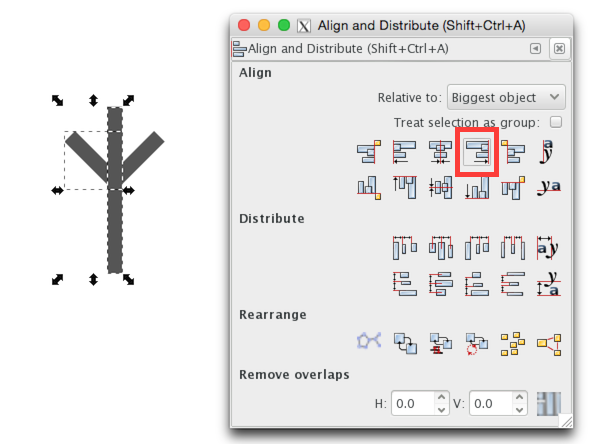
To achieve precision in this step, select both the rectangles and go to Object->Align and Distribute (Shift+Ctrl+A).
Then click on Align Left Edges relative to Biggest Object as shown below.
Step 5
Duplicate the smaller rectangle with Ctrl+D, then click on Flip Selected Objects Vertically (V) from the menu bar.
Align this to the right edge of the bigger rectangle using the Align & Distribute (Shift+Ctrl+A) window. This time select Align Right Edges.
This is what we have made till now:
Step 6
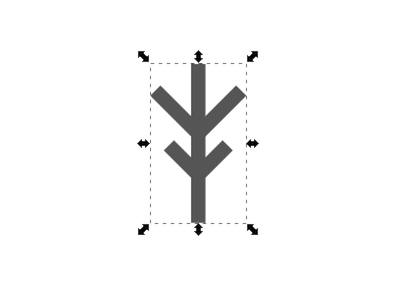
Repeating the above steps, add another pair of rectangle to add more detail to the snowflake branch as seen in the image below.
Select all these elements and group together with Object->Group or Ctrl+G.
2. Create your Snowflake
Now that we are done creating the base branch of our snowflake, we will use it to create the snowflake.
Step 1
Select the branch and Duplicate it.
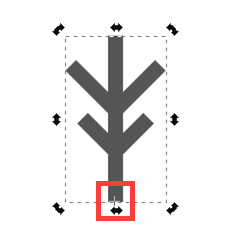
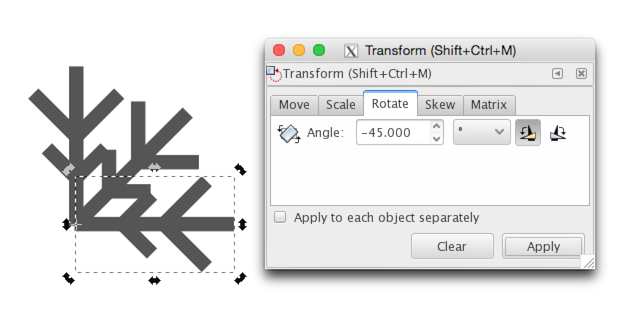
Click on the duplicated branch to enable rotation. You will see a crosshair in the center. This is the centre of rotation – the point around which the object can be rotated and skewed.
At this point, the centre of rotation is in the middle. Drag this point to the bottom-center of the shape as shown below.
Step 2
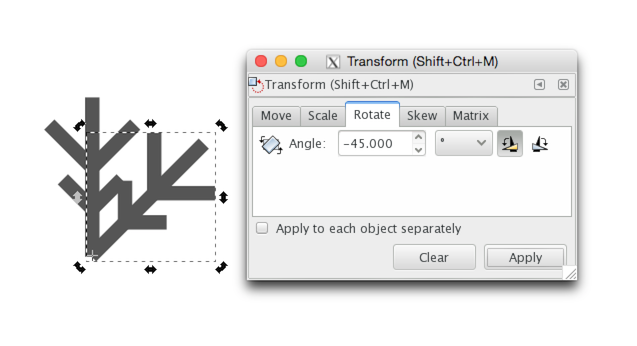
Open Transform window, go to Rotate option and enter -45 degrees.
Our Snowflake has started to take shape now as seen in image below.
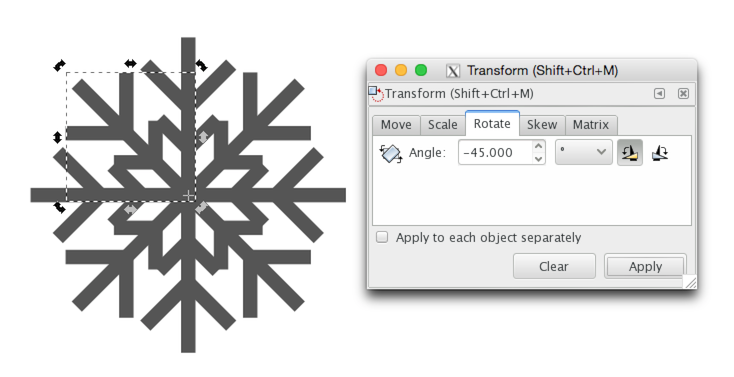
Step 3
Select the rotated branch, Duplicate it with Ctrl+D and rotate it again by -45 degrees using the Rotate option in Transform window.
Step 4
Repeat these above steps and add 5 more branches to complete the Snowflake.
3. Fill in some Color and add Background
Select the snowflake and change its fill color and add a background.
Final Image
This is the Snowflake that we created in Inkscape. How quick and easy was that!

As you can see in this tutorial, by just using the basic rectangle shape and simple transformations, we easily created snowflake in Inkscape. By making changes to the base branch, you can create a variety of different Snowflakes.
Video Tutorial: Create Snowflake in Inkscape
You can see all the above steps in action in this video.
Please share
If you like this tutorial, do not forget to share it on your social channels. And, before you go, don’t forget to download our freebie – Christmas and New Year greeting card vector.