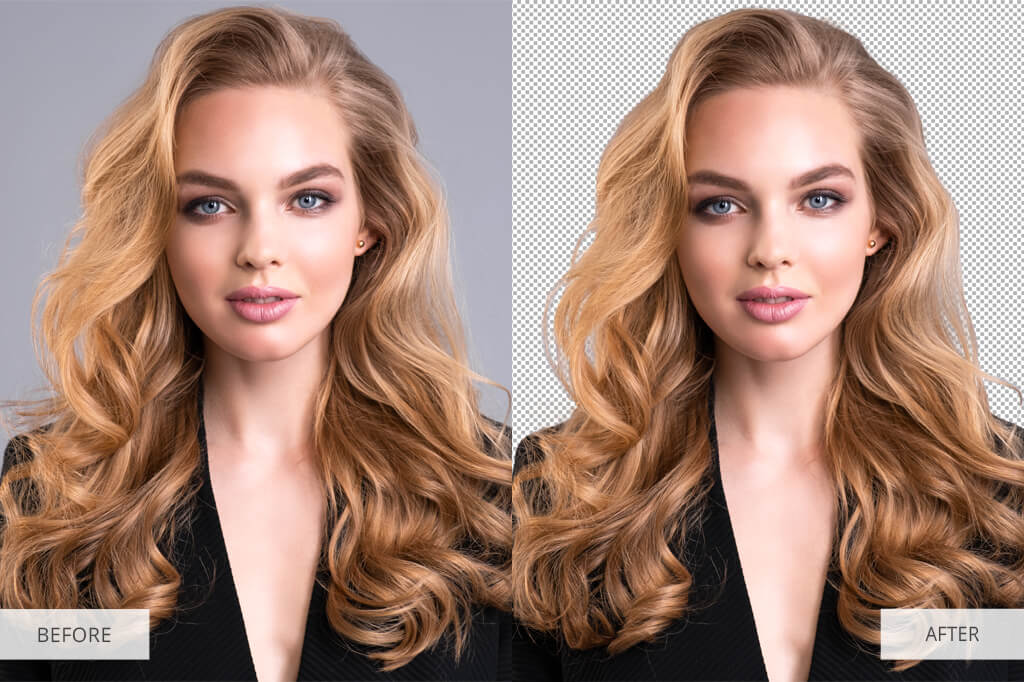
If you need to erase background in Photoshop from your photo quickly to highlight smaller details or place them on a new background, you can follow three ways.
The 1st way is to address professional background removal service, which charges just $2 per photo.
The 2nd way is to use the Free Online Background Remover avoiding Adobe Photoshop subscription.
The 3rd way is to use Photoshop, the main functions of which we have described in this small review. Here you will learn how to remove the background by using an eraser or choosing the right mask.
1. Open the Necessary File
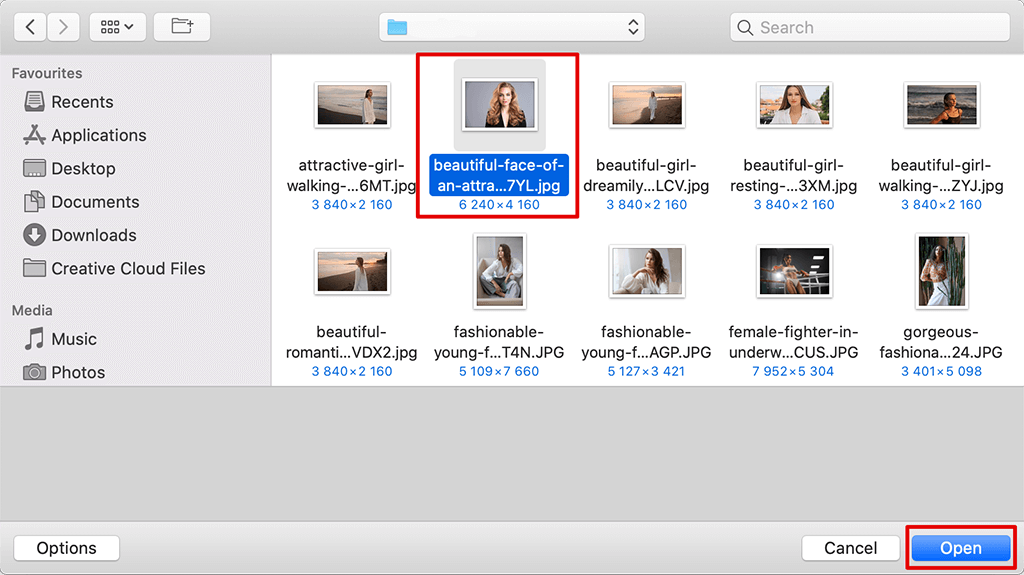
Launch Photoshop on your Mac or PC. Upload the image from which you’d like to erase background by opening the “File” menu and then click “Open…”. Also, you can simply pull a picture from any folder into the opened Photoshop, or right-click on the image file and use the “Open with…” command and then select Photoshop.
2. Select the Desired Part
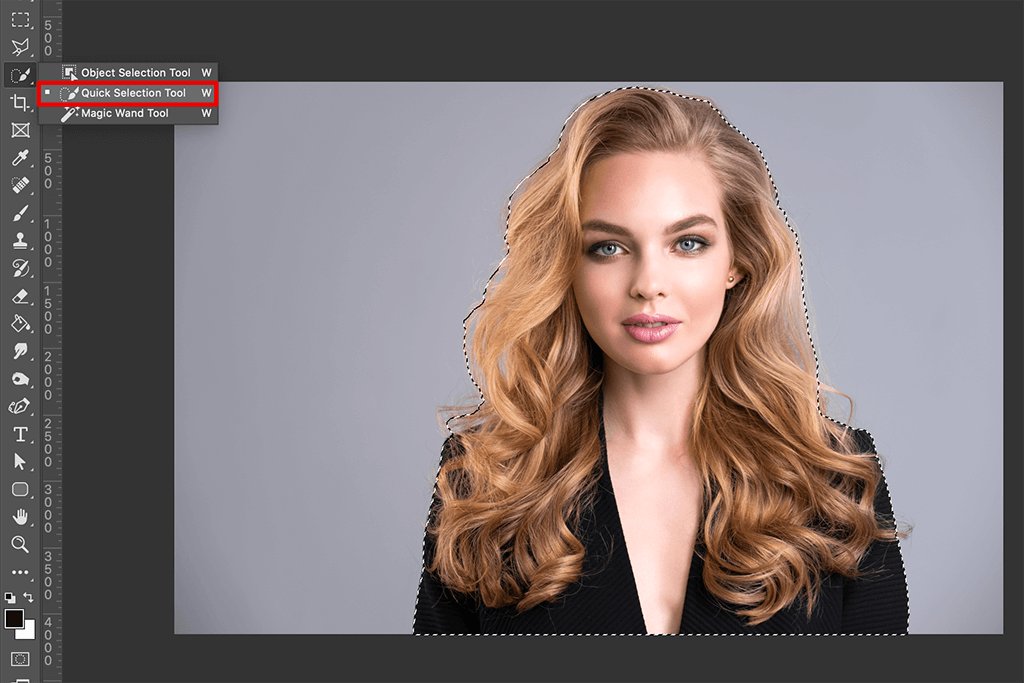
To select the desired object, you can use one of two tools – “Quick Selection” and “Magic Wand”. Use these instruments for different types of objects and backgrounds.
If you work with a contrast image and the main object stands out well, the “Magic Wand” will quickly help you capture all the details. In case some elements are not in the selected area, or you need to remove the unnecessary parts, you can use the additional settings in the upper-left corner.
If the background and object have similar colors, it is better to use the “Quick Selection” tool which controls every pixel in your photo and can be adjusted more accurately. Press the ‘Alt’ or ‘Option’ key to activate the subtraction mode and then click and pull your mouse around the background section you want to erase.
3. Create a Mask to Refine Edges
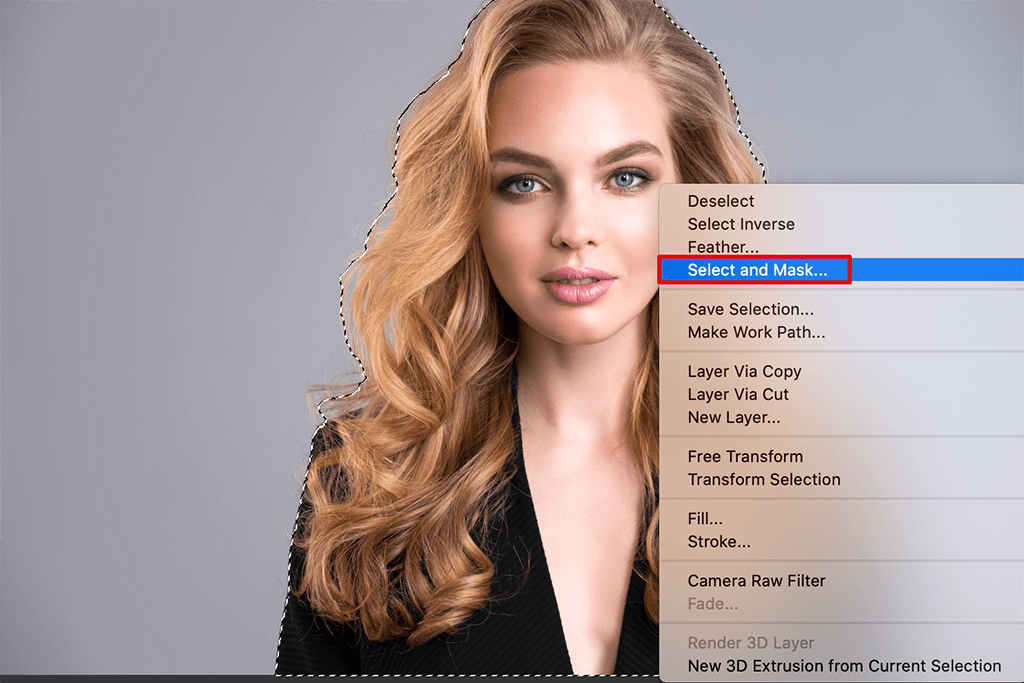
This tool is especially helpful if you need to select the model’s hair or other small details that cannot be captured by the previous tool. Although in more difficult cases, we strongly recommend using the background removal service and let the professionals handle your photo.
To use a mask on the selected area, right-click and choose “Select and Add Mask”, and a new working window will open.
4. Edit the Edges Using the Layer Mask
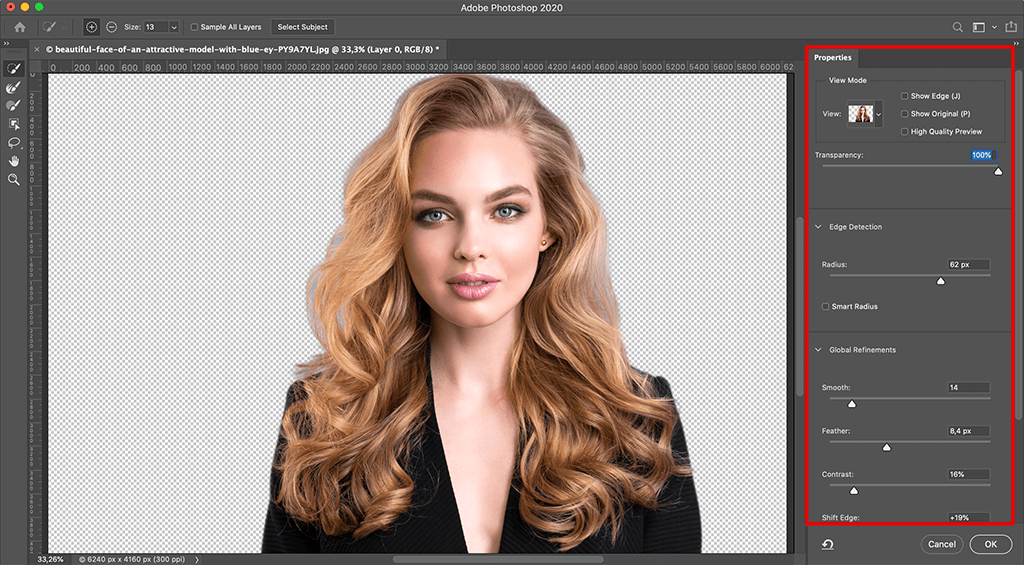
To erase background more effectively, use the refine edge dialog for a more precise selection of the necessary area. First of all, exit the View Mode and choose ‘On White’ or any other option that will be in a great contrast with the selected area. Such manipulations will allow you to clearly see the parts of your edge that need to be improved.
Choose the Adjust Edge option and drag the Smooth value slider to make the ragged edges softer. To achieve the smoothing effect, you may need to modify additional sliders. It is better to choose a small brush size and a weak stiffness and increase these parameters in the course of work if necessary.
By clicking on the plus sign in the upper-left corner, swipe along the edges of the object to make them clearer. With the minus sign, you can return the previous version of the selection. Click OK when you have finished your work.
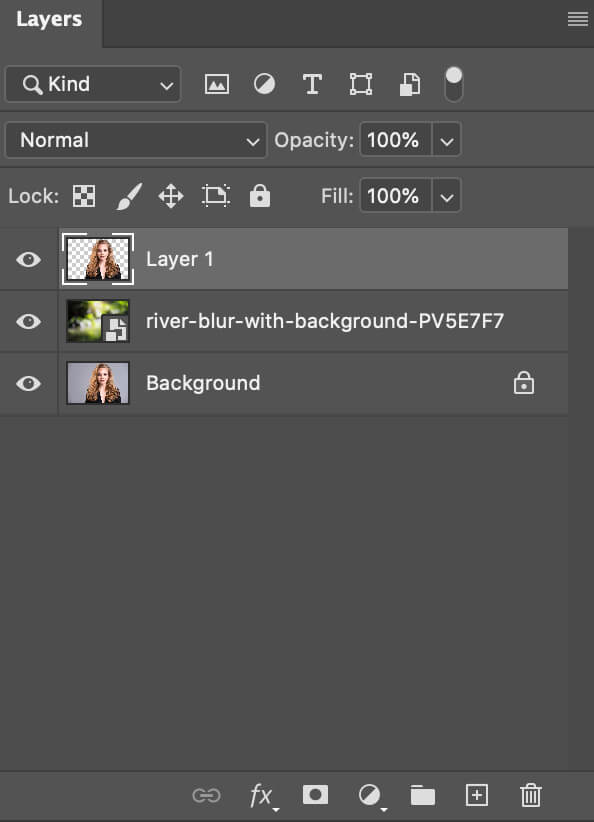
5. View Your Selection on a New Layer
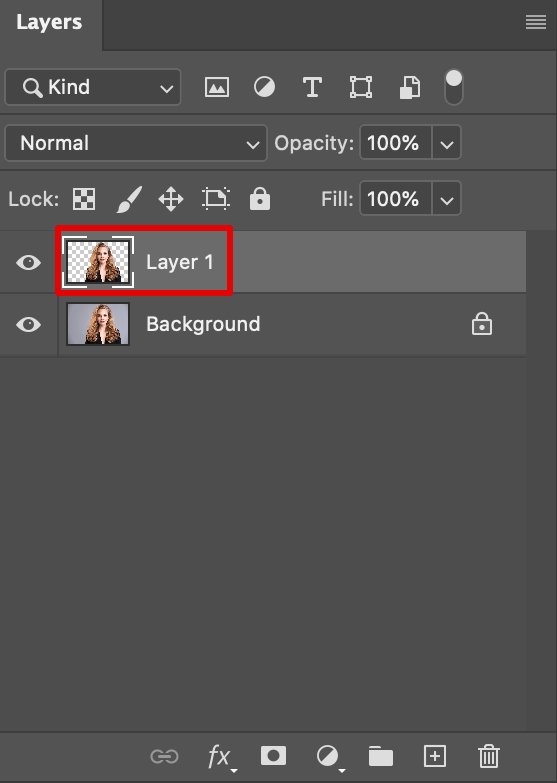
The last step to erase background in Photoshop is to review the result you’ve achieved. Right-click within the selected area and choose the Layer Via Copy option. You can assign the selecting to a new layer or sans background without affecting the original image.
Switch off the visibility of your primary background layer to compare the processed fragment and the original image.
6. Use the Pen Tool if Necessary
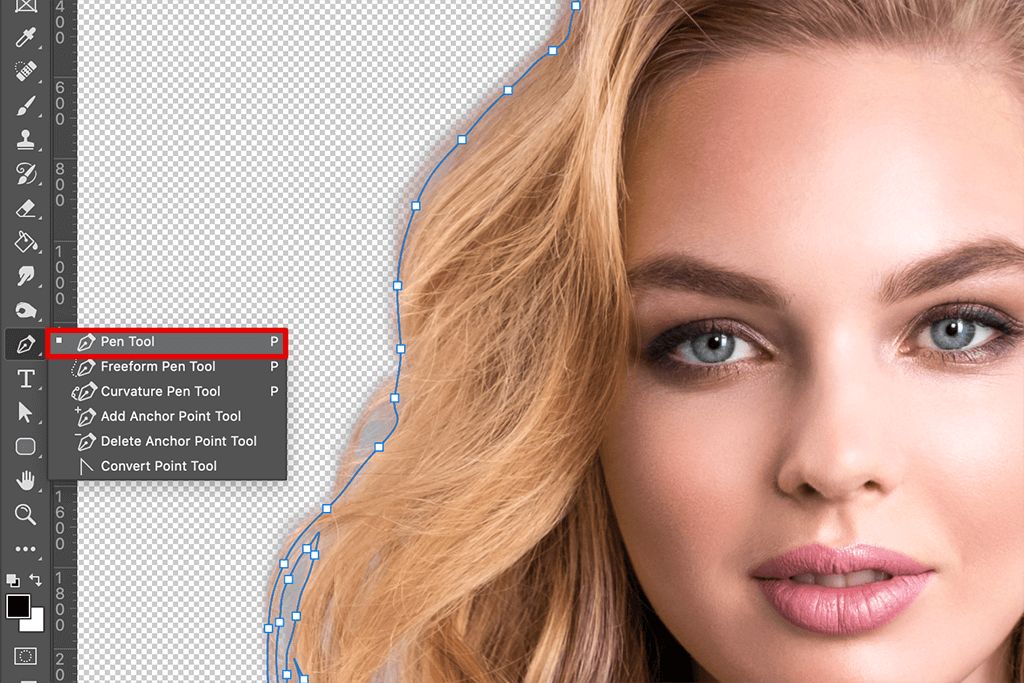
If your object and the background are in the same color palette, it may be difficult to erase background without distorting the object’s outline. For example, it will be difficult to distinguish between a white T-shirt on the model and a light wall in the background when you zoom in on the photo.
In this case, use the Pen tool for creating a clean selection and removing the unnecessary background.
7. Correct the Result
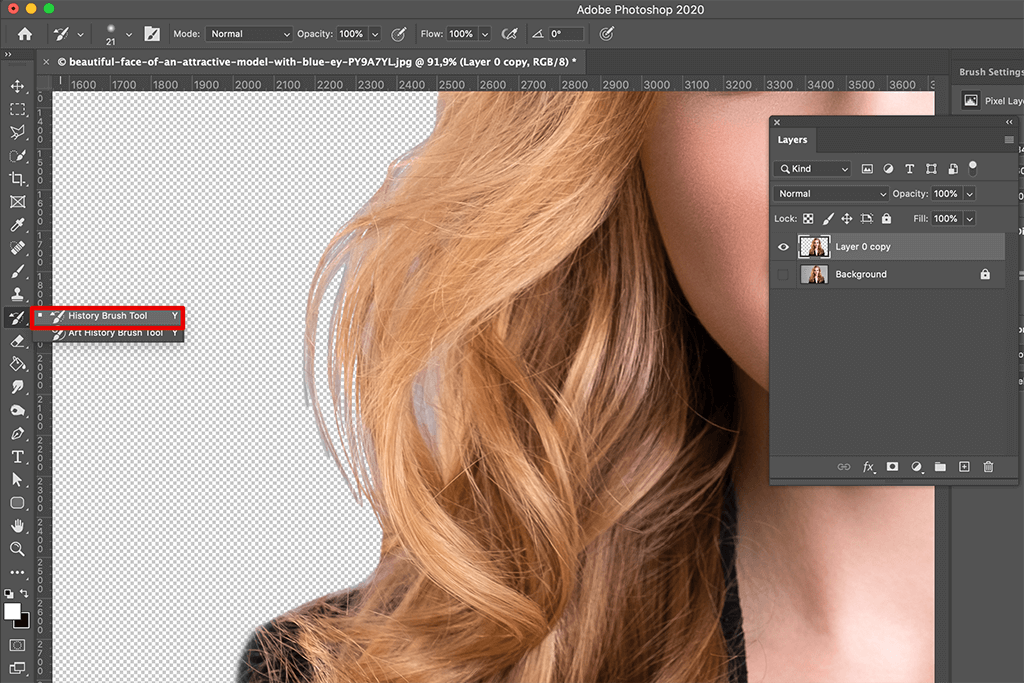
To restore accidentally deleted objects and details, we recommend using tools like the “Archive Brush”. With its help, you can draw the missing elements from the lower original layer and move them to the main layer of the document.
To get rid of the unnecessary details, use a regular eraser. Many online services or alternative editors offer this tool because it is very handy for removing simple backgrounds but requires a lot of time and attention when deleting the background near an object.
8. Change the Background
After you have taken the object out of the previous background, you can add your own one. To perform this action, add a new file with the background you want to Photoshop and place it on the bottom layer, or create a clean layer and use any fill.
To achieve the more artistic and original effect, we recommend using free Photoshop textures including grange textures, watercolor, grass and textures of different materials that will fit any type of photo.
9. Remove/Add Objects to Your Images
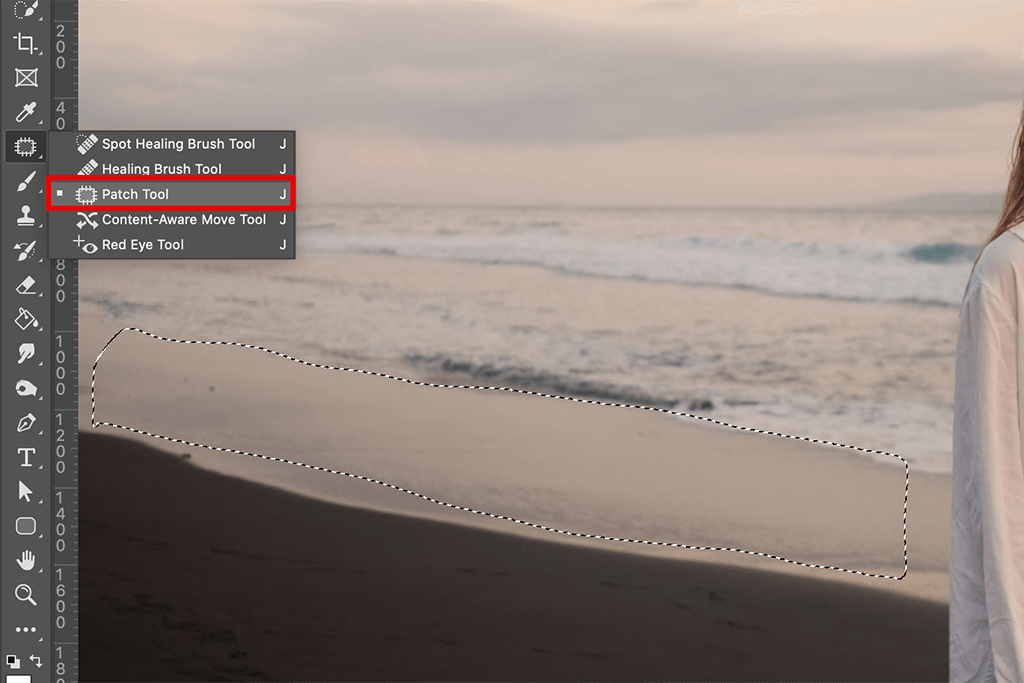
If you aim to delete only one fragment of the background image, use the Patch tool to copy a replacing fragment from another part of the background. Use the Crop tool to enlarge the canvas, fill that emptiness, and add more to your image.