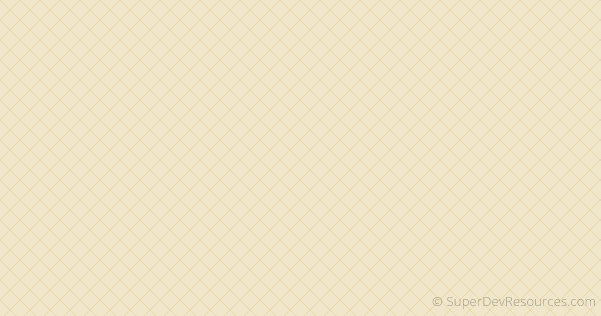
Last time, I showed how you can make blurred background and use it in your apps. Using blurred image as app background however is not the only option that you have. Grid patterns are also quite popular among designers. You can use grid patterns to create simple yet elegant backgrounds for your app. In this tutorial I will show how you can create a diagonal grid pattern background from scratch using free image editing tool, Gimp.
I have divided the tutorial in three parts. In first part we will create a pattern file. In second part we will see how to load this pattern file in Gimp. Finally in third part we’ll learn how to select the pattern and make it repeat across an entire layer to create a background. I will be using Gimp 2.8.10 for this tutorial.
In case you don’t want to create pattern file, you can download the pattern file I created and skip to the second part of tutorial, where I will show how you can load it in Gimp and then use it to create a background.
Part 1: Create pattern file
Step 1
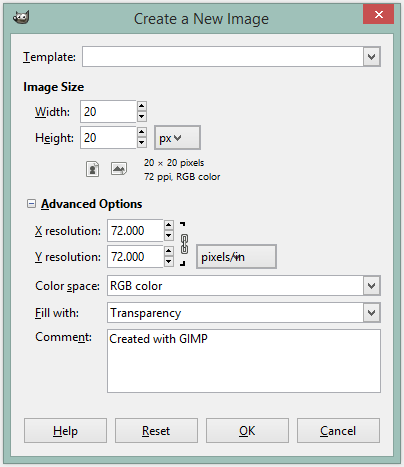
Launch Gimp then go to File -> New and create a 20px x 20px image.
Go to Advanced Options, make sure you set the Fill with parameter to transparency.
Step 2
Zoom in to 1600% so that we can see what we are doing.
Step 3
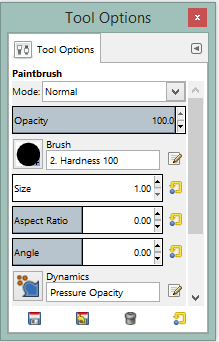
Grab Paintbrush tool. In the Brushes dialog, choose Hardness 100 brush.
Set brush size to 1.
Step 4
Select foreground color, I chose black (#000000).
Using paintbrush click on top-left hand corner of the image to mark the starting point.
Now hold down the Shift key and move your cursor to the bottom-right corner.
Left click on the mouse or touch pad and let it go while keeping the Shift key held down.
Here you have drawn the first diagonal. Repeat the process to draw the other diagonal joining the top-right and bottom-left corners.
You should end up with a image resembling an “X” as shown below.

Step 5
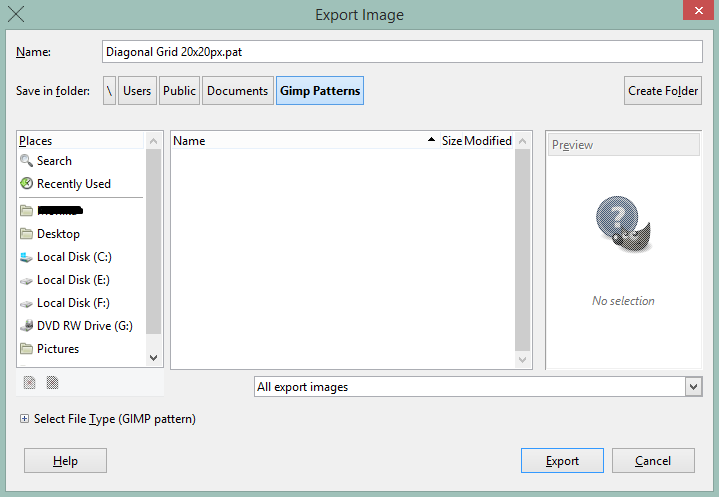
Go to File -> Export As and export your image as a Gimp pattern (.pat) file.
I exported my file to C:UsersPublicDocumentsGimp Patterns.
Since GIMP 2.2 you can also use .png, .jpg, .bmp, .gif or .tiff files as patterns. As we are working on Gimp 2.8.10, we could also have exported it as a .png file.
Part 2: Load pattern in Gimp
Step 1
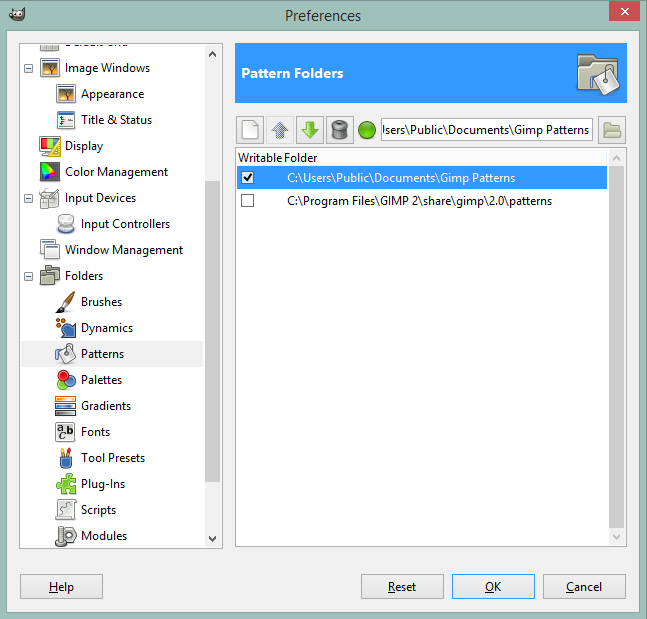
Go to Edit -> Preferences. When the Preferences window shows up, navigate to Patterns under Folders. Now add the folder where you saved the pattern file to the list of existing default folders.
In my case I added C:UsersPublicDocumentsGimp Patterns.
Step 2
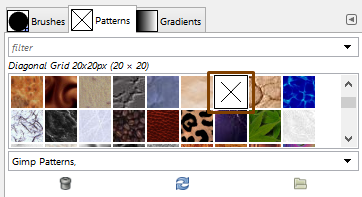
Close gimp and open it again.
Your pattern should show up inside gimp’s Patterns dialog as shown below.
Part 3: Create background
Step 1
Now we will use the pattern that we loaded in Gimp in previous step to create the background.
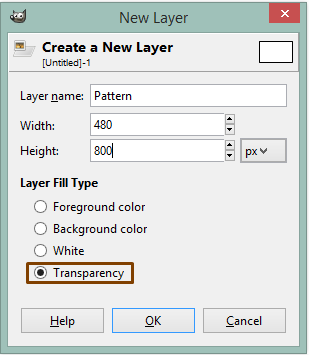
For this create a new image, I made mine 480 px by 800 px for demonstration purpose. You may opt to create a higher resolution image to support different devices.
After this step a background layer will be created in the Layers dialog.
Step 2
Select Bucket Fill tool.
In tool options, set fill type to FG color fill. Choose a foreground color of your choice (I selected #F0E7CA) and fill background layer with it.
Step 3
Add a new transparent layer from menu Layer -> New layer or from Layers dialog. Name it Pattern.
Step 4
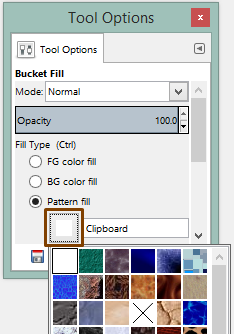
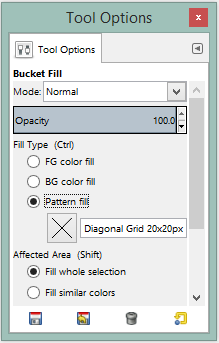
Select Bucket Fill tool and set fill type to Pattern fill .
Click on the pattern preview thumbnail in the tool options dialog. This will open a pattern picker, select your pattern from the list.
Step 5
Below is what the bucket fill tool option should look like after you have selected the pattern. Fill this pattern in the Pattern layer.
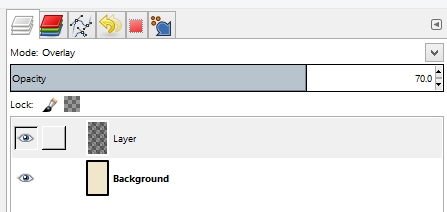
Step 6
Select Pattern layer.
Change its mode to Overlay and reduce opacity to blend the pattern with background. You can play around with the opacity value to get the desired result. I set it to 70.
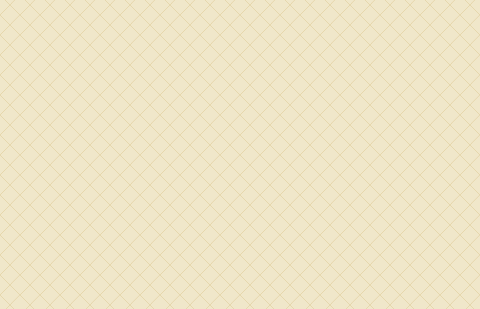
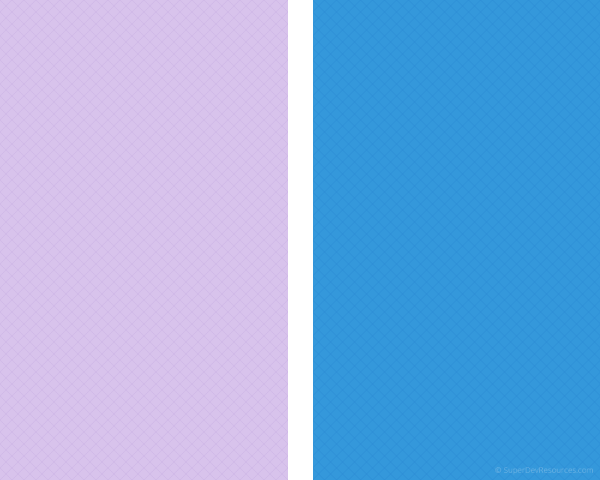
Final image
Below is what your final image should look like.
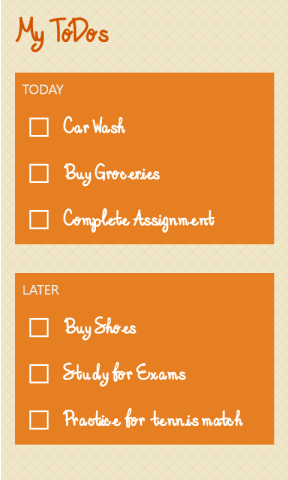
In following screenshot you can see how the background we created above looks when used in a mock-up todo app.
Experiment with colors and shapes
By using different colors in the background layer, you can create beautiful pattern backgrounds.
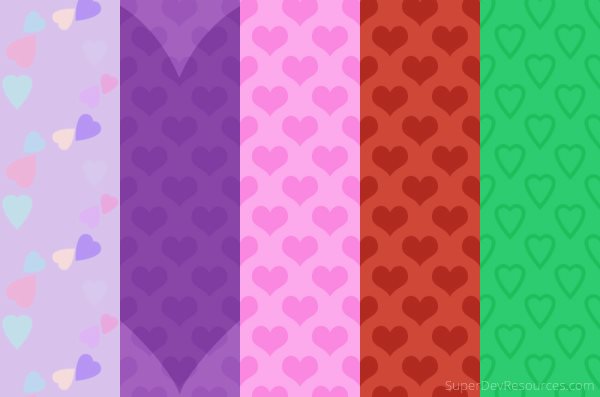
Instead of drawing diagonal lines as shown in first part of this tutorial, you can also draw shapes like star or heart and create backgrounds similar to Valentine’s day themed backgrounds from my earlier post.
Download and Share
You can download the pattern file and backgrounds that I created for this tutorial below. And, if you found the tutorial useful then please share it with others :)
Thank you very much for such a great post.
You’re welcome!
Very applicable tuts !
amazing
Thanks for the help!
I’ve followed all the steps, but when I get to the exporting part it says that I am not permitted to access. What do I do? :( Please help, thank you x